Make this lovely modern top: free pattern included :
Inspired by…these cute tops from Nasty Gal
The “Meryl” blouse: a modern sleeveless A line top
My daughter asked me to make her a loose fitting top with cutaway-sleeves to wear over leggings and jeans recently. I made her one and she was so happy with it, I made a few more with a variety of details and lengths. I think it has a nice flattering line.
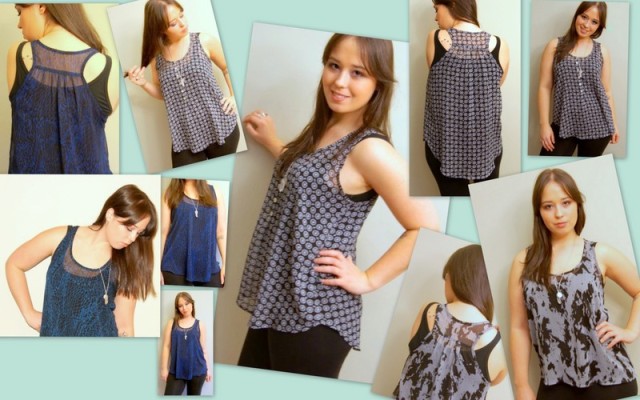 It The top has a scooped round neck, and cut away, yoked back. The natural “drape ” of the lightweight fabric is essential – I used a variety of fabrics from cotton to polyester and chiffon. They are useful to throw over a bustier or a coordinating or contrasting tank top.
They are popular for spring, especially in the bright colours reminiscent of the 80′s. Tangerine, purple, shocking pink, green, cobalt blue have made a comeback in silky, sheer and shiny fabrics.
I found that the fabrics cost between $10-15 per meter. I needed about 1 meter for these longer styles, because I made my own bias binding for the neck. (This tutorial shows how: http://www.burdastyle.com/techniques/continuous-bias-binding-how-to-tube-style-fiskars-unzipped–2 ).
Actually 1 meter also left enough fabric to make a nice long roll edge scarf which we gave away as Christmas presents to friends . If you use purchased bias, 60 -80 cm of fabric is enough for the cropped version. – it all depends on the length you want.
Natalie is modelling a floral version here

Tutorial:
The “Meryl” blouse from a $2 dated”shell” blouse.
I shop Thift stores a lot (called 2nd hand, or charity stores in some parts of the world) and noticed that there are a lot of the 80′s style “shell” blouses in these bright colours: round neck and cap sleeves.
They usually cost between $2-4, so I decided to see if they could be re-purposed into a mod top like the “Meryl”above.
Here is the result: (Sorry, no-one here to model them for me right now, but the pattern is the same as the tops pictured above)
Front and .. Back


The front is cropped shorter than the back – asymmetry is all ‘the thing” now, which makes it really easy- anything goes. This top is not as flared as the ones above, but it is still roomy. This free pattern can be shortened easily for cropped tops to show a little navel.
Here’s how you do it:
Supplies and tools:
1. silky shell top in a bright colour that fits loosely (go up 2-3 sizes)
- the larger the better, especially if you want a longer garment and a more flared look. Thrift store often hang their very large size clothes separately from others – these clothing items often yield more material than others, so check through the rack.
- Check for stains or obvious rips before purchasing
- OR use purchased fabric (I use cheap thrift store fabric to try my patterns first)

- dressmaker’s scissors (buy the most expensive you can afford – it’s worth it in the long run. )
- seam ripper (essential – plan to use it often)
- dressmaker’s pins
- sewing machine with straight and zigzag stitch
- fine sewing machine needles (size 70, universal point)
- iron
- ironing board

- light weight thread the same colour as the garment or fabric
- single fold bias tape the same (or similar) colour as the garment/fabric. Try to use the very lightweight silky type rather than a heavy cotton for flimsy fabrics
- Alternately one can make one’s own bias binding from the fabric (Bias Binding Tutorial: )
Turn the shell inside out, and fold one side into the other with a fold down the middle front, and the middle back.
Either use a top (a tank top is great) that fits you as a guide, or this free pattern : Meryl blue cropped top Pattern.
The pattern is hand drawn onto 1cm squared grid pattern paper. Print the 7 pages off and join them together matching the symbols. Sorry it looks very amateurish – will have to find another way, but this is good for now. If you would like a paper pattern , email me.
This is a flowey, loose fitting top that is worn over a bustier or tank, so it is not critical.

Fit the shoulder seam to the top’s shoulder seam. Cut out a scooped round neck at the front, cutting off the old faced front neckline

Now use the paper pattern for the back yoke (matching the shoulder seams as before) and back lower part on the center back fold
OR
Cut the back neckline shallower, cutting off where the old facing is attached (you may need to unpick it a bit if it is sewn down) Sorry forgot to take a pic of it ;-(
Cut out large cutaway armholes so that the front straps are about 5-6 cm wide (the blocks on the pattern in the pic are 1 cm squares)
Cut the side seams at the underarm a little so the front and back are separate from each other under the arm. Either angle (Flare) the side seam from the underarm to the hem, or extend the armhole to the edge of the side seam front and back.

OR if you don’t use the pattern, cut the back horizontally across about 10-15 cm below the back neckline

Cut 3 cm off each side of the top part on either side, sloping it to the shoulder to match the front (this makes a yolk for the back)

*********************************************************
Finish Neck opening: Use the bias binding to bind the neck: Skip next part if you already know how. Use purchase or make your own.
How to attach bias binding: a 3 step process
Step 1. Open out the end of the tape completely and fold it back towards the inside about 1 cm

Attach bias with a pin at the center back of the neck with the outside of the tape against the WRONG side of the top : this is CRITICAL hence the note!

- Sew the tape down to the fabric, following the line of the outer fold, and matching the right hand edge to the curved edge of the neck opening. (You may want to practice this a bit first if this is your first time). Try to sew just fractionally to the right hand side of the fold, in that way your fold will be very crisp.
- Sew slowly, a few cms at a time, turning the fabric as you go. Pinning doesn’t really work, because of the next point:
- Stretch the tape slightly as you go…a slight tension is good, don’t go overboard – there should be no tucks or gathers!


Sew tape all the way around the neckline, until the tape overlaps the beginning by about 1 cm

TIP: I usually turn the garment over and look at the neckline from the other side. If the sewing is a little uneven, I sew around the neckline again, using the edge of the neck as a guide) ….I’m a bit of a perfectionist though
Step 2; Now fold the tape towards the outer /right side of the garment, and pin down making sure all the layers are tucked between the fold.


Carefully sew the tape down very near to the edge , tucking the edges of the neckline inside for a neat finish.


Sew all around to back of neck
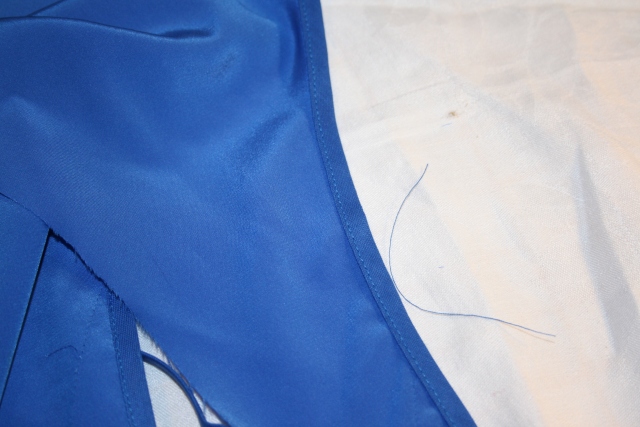
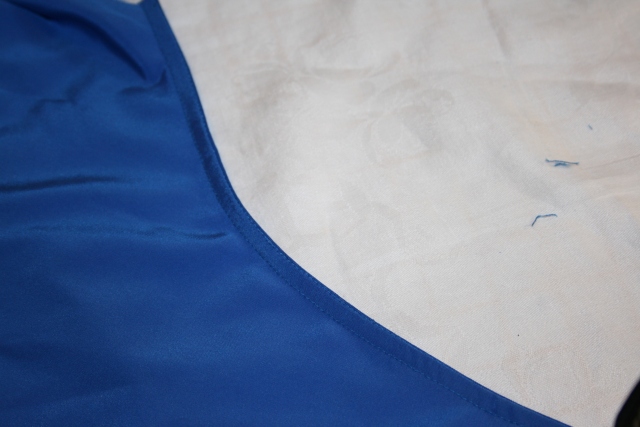
The neckline should look something like the pic below. Don’t be alarmed if it doesn’t seem to lie flat, it will be fine once you iron it flat.

Some people like to see the bias binding finish ( above) make the binding a contrasting colour for an interesting detail. One can, however, also make it disappear by continuing to step 3..
Step 3: Turn the bound edge towards the inside of the garment, but pin from the outside.
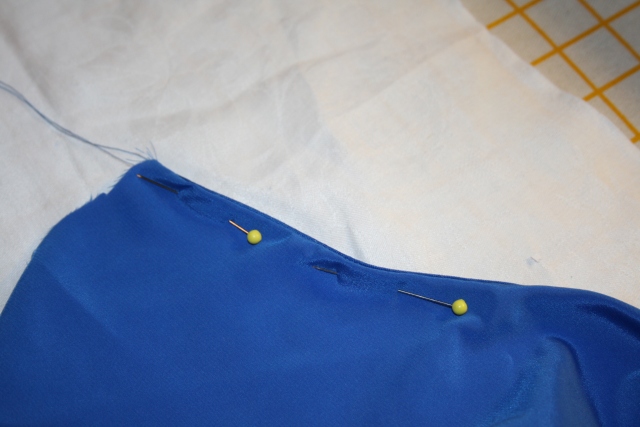
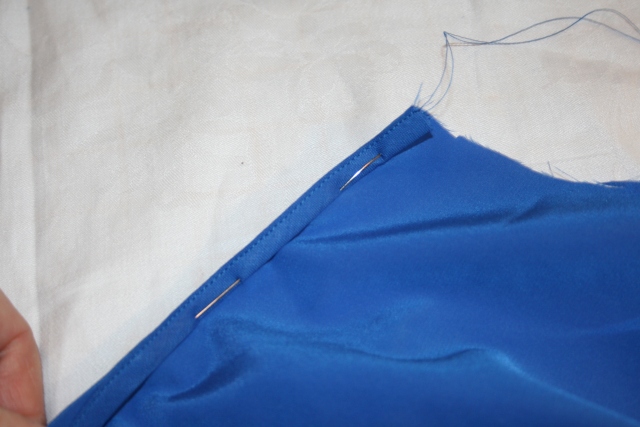
Again sew it down from the outside, using your machine presser foot as a guide to get a very even line an even distance from the edge. The edge of the binding may just show slightly. Don’t be alarmed if it doesn’t seem to lie flat, it will be fine once you iron it flat.
************************************************************************************
Attach back to yoke:
Gather the top of the lower part of the back, and pull it up until it is the length of the back yoke

How to gather fabric:
- Loosen the sewing machine’s top tension a little (one notch is OK) or until the top thread pulls slightly to the back
 |
| Loosen the sewing machine’s top tension a little (one notch is OK) or until the top thread pulls slightly to the back |

- lengthen the stitch length (I use 3-4 mm) . Normal stitching is about 2 mm depending on the machine.
- Now sew two parallel lines of stitching as near to the edge as possible (3mm and 5 mm from edge)

Hold the back thread together and pull the fabric gently so that it gathers up. Because the top tension was loosened, the bottom thread slides through the loops easily.
Adjust the gathers so that the gathered edge fits to the lower side of the back yoke

Re-adjust tension and stitch length back to to normal before continuing
With right sides together, pin, then sew gathered portion onto back yoke with a narrow (5mm seam).


Finish the raw edges with a row of zigzag
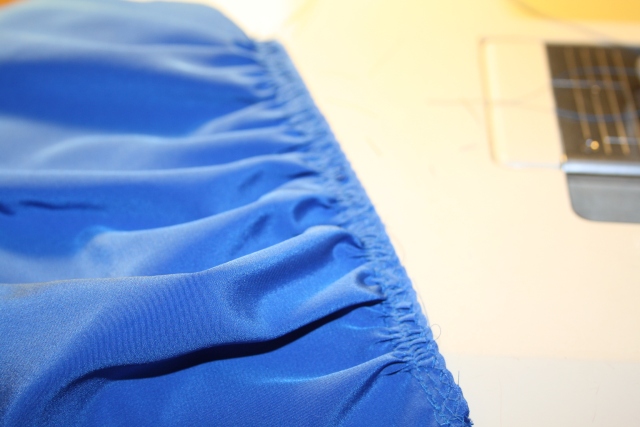
Turn to right side and remove the gathering stitch that shows
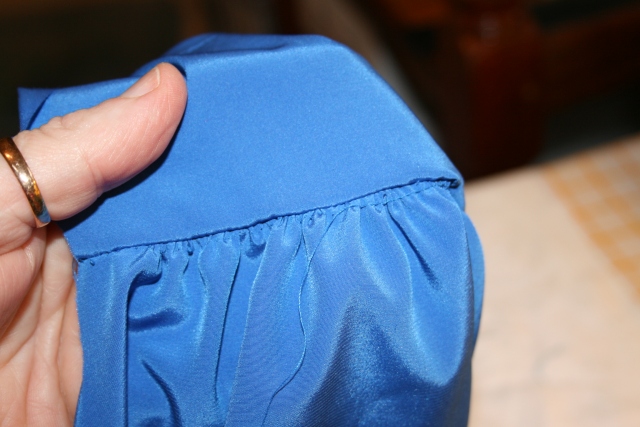
From the outside (right side) topstitch the gathered part down to the lower edge of the yoke. (Sorry I don’t pin much, but if you are a beginner, stop and pin each step first)

**********************************************************************************
The armholes:
Staystitch front armhole: Tighten the tension of the sewing machine slightly and stay stitch the front of the armholes with a row of stitching a few mm from the edge. Pull it up slightly – don’t gather it, just tighten it slightly. . this prevents the armhole from gaping open. Try the garment on, and check that it is tightened enough and doesn’t gape. If you have a “fuller figure”, you may want to make a small dart under the arm before binding

Re-adjust your tension before continuing
Bind the arm with bias just like the neckline: If it is slightly gathered, no worries ……just iron it and it will flatten.

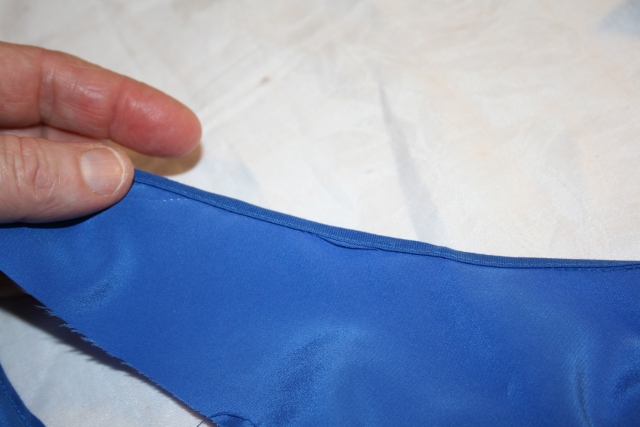
If you make a mistake like this (below) and don’t get all the edges within the bias fold, unpick that portion and redo or it WILL fray .
*************
Sew underarms together :
Match side seams at underarm and TRY ON!! Adjust the size to suit your taste – some prefer fitted look, others a more loose, draped look. I flared the sides a little to get the armhole to fit with the wider hem – adjust according to your garment and size.
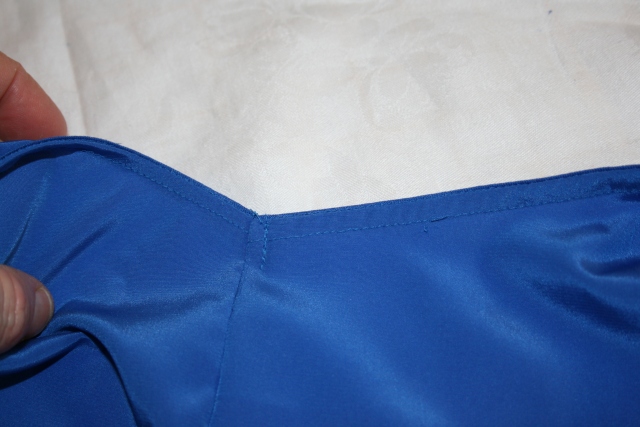
If it fits OK, sew side seam, right sides together. Sew down until you reach the original side seam. Finish the raw edges with a zigzag stitch.

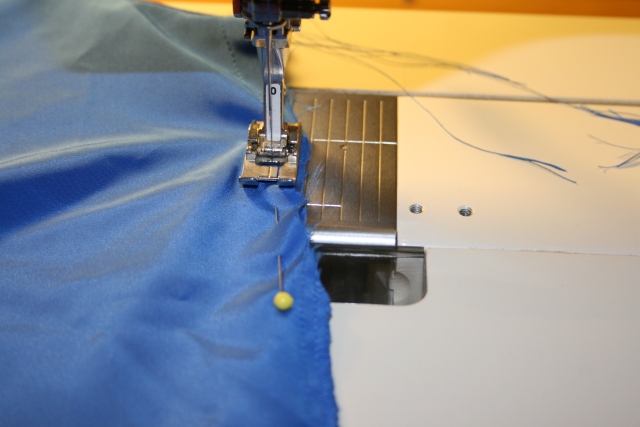 From the outside, sew the rough edges down together towards the back with a few stitches.
 *******************************
Finish lower front edge. (optional)
The lower front edge should be intact from the original garment, but I decided to make the front asymmetrically shorter for a cropped look. One could also chose to shape it etc. The top I woas working with has side slits so this made sewing the bottom easy.
The bottom front of this top was a little curved, so I evened it out to make it straight.
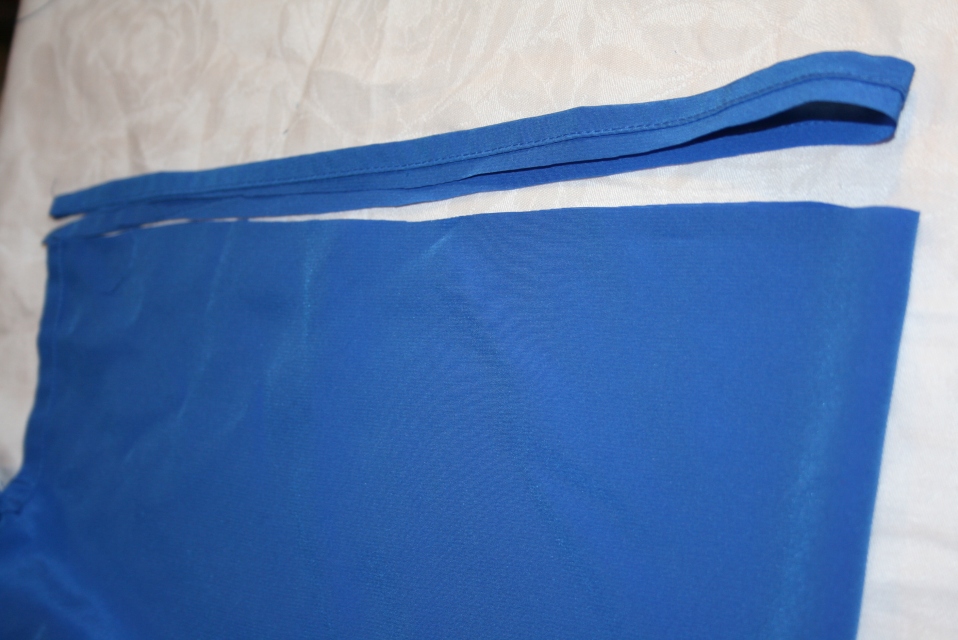
Then I turned the front hem up by about 4cm, leaving the back longer, but one could make both the same length. I find if I iron the hem first, it is easier to sew down neatly.
First iron a small hem of 1 cm
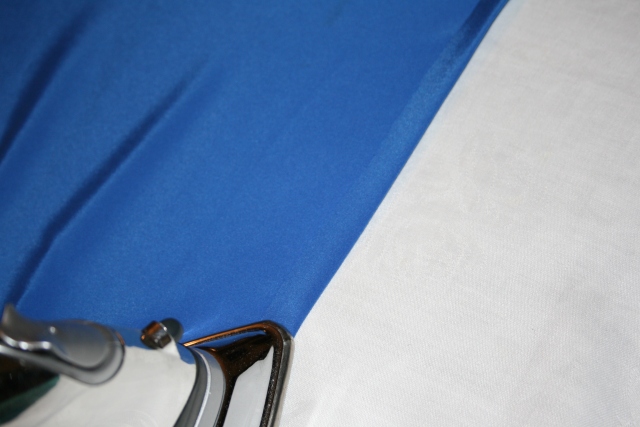
Then use a gadget thingy (I use my buttonhole spacer ) to measure an even hem, and iron. Pin in place and sew.
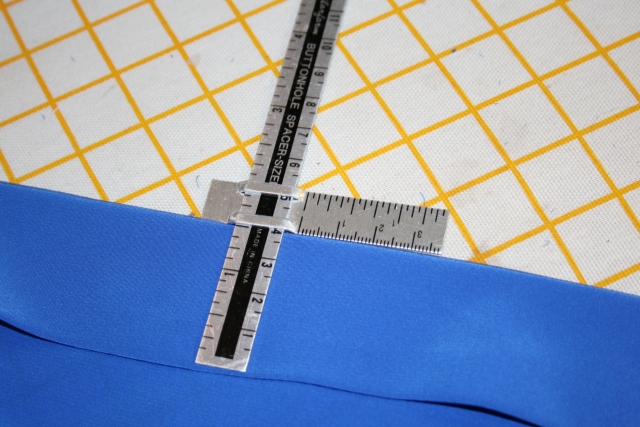
And…
It should look something like this…and cost about $3!

General time and energy saving tips:
- I found that the only way I could get sewing done when I am very busy is to keep my machine set up and plugged in. I cover mine to keep dust off it. I found I got a lot more done than if I had to get the machine out of storage every time. Try to set it up somewhere, so it is ready at hand.
- I try not to sew when I am tired – I make too many mistakes, which becomes too frustrating. If things are going wrong, I just put it aside and come back to it another day.
- Always sew flat rather than in a tube. It is not the traditional way, but it is quicker. (For instance, traditionally one sews the side seams together before binding the armholes ,but I find it easier to do it flat)
- If you possibly can, invest in a serger – you will save yourself YEARS at the sewing machine over your lifetime. Mine has paid for itself 10 x over….and it does make he finish so much nicer

- Break every task into smaller tasks and tackle them one at a time. This will make a task seem less overwhelming, especially when you are just starting out. Even if you only get half an hour a day, you can do a little every day ( even if it is just one cuff, or seam) and have a garment made by the end of the week.
- Needle size is VERY important, as is the sharpness of the needle. Discard needles after about 5 hours of sewing. It makes a huge difference to the sewing tension and neatness. I tend to be very picky, and will spend at least one third of my sewing time unpicking and redo-ing…but that’s just me.
- My Mum’s secret to get neat, professional looking garments is to iron and sew alternately. I always have mine nearby and ready to go. I have a small pull-out ironing board built into the left-hand side of the sewing cabinet I use (MOBD: my own design), and it is very useful.
- Iron all the interfacing on the fabric (when needed) straight after cutting out so it is ready to sew.
Pippa


No comments:
Post a Comment